
Swimming Pool Pump Manual: Troubleshooting & Maintenance
Maintaining a pristine pool hinges on your pump; it’s the filtration system’s core․ This guide offers solutions to common issues, ensuring a healthy, sparkling pool experience․
Understanding Your Pool Pump
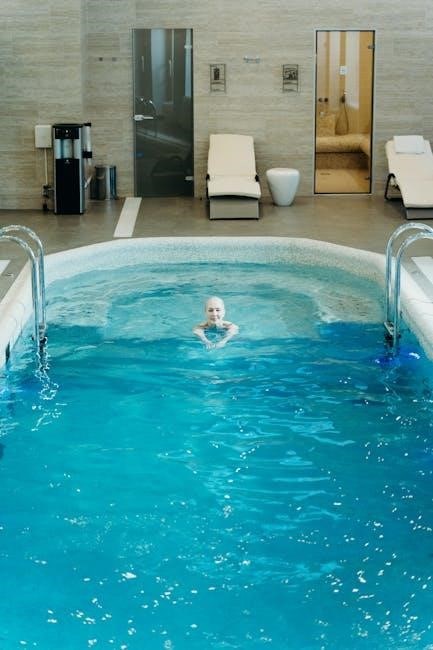
Your pool pump is the engine driving water circulation, essential for cleanliness and chemical distribution․ It draws water from the pool through skimmers and the main drain, pushing it through the filter to remove debris․ Understanding its role prevents stagnant water, algae blooms, and costly repairs․
Pool pumps aren’t simply ‘on’ or ‘off’ devices; they operate within a system․ Water flow is critical – too slow, and filtration is ineffective; too fast, and the filter may not capture everything․ Recognizing the pump’s connection to the filter, plumbing, and electrical components is vital for effective troubleshooting․

Before diving into repairs, familiarize yourself with your pump’s specific model․ Knowing its horsepower, flow rate (gallons per minute ― GPM), and voltage will be crucial when seeking parts or professional assistance․ A well-maintained pump extends the life of your entire pool system, saving you money and ensuring a safe, enjoyable swimming experience․
Pump Components & Their Functions
A pool pump comprises several key components working in harmony․ The motor provides the power, while the impeller, a rotating component, creates suction and drives water flow․ A pump housing encloses these parts, ensuring structural integrity and directing water movement․
The pump basket, easily accessible, catches large debris like leaves and twigs, preventing them from damaging the impeller․ Suction and discharge ports connect the pump to the pool’s plumbing․ O-rings and seals prevent leaks, maintaining optimal pressure․
Understanding each part’s function is crucial for diagnosis․ A clogged basket restricts flow, a worn impeller reduces suction, and failing seals cause leaks․ Regular inspection of these components allows for proactive maintenance, preventing larger issues․ Knowing where these parts are located will also help when it comes time for repairs or upgrades․
Types of Pool Pumps: A Comparison
Pool pumps primarily fall into three categories: single-speed, two-speed, and variable-speed․ Single-speed pumps are the traditional, most affordable option, running at a constant, high speed․ They’re simple but consume significant energy․
Two-speed pumps offer a high and low setting, providing some energy savings and quieter operation․ They’re a step up in efficiency but lack the customization of variable-speed models․

Variable-speed pumps are the most energy-efficient, allowing precise speed control․ This optimizes filtration, reduces noise, and significantly lowers electricity bills․ While initially more expensive, long-term savings often outweigh the cost․ Choosing the right pump depends on pool size, usage, and budget․ Consider local regulations, as many areas now mandate variable-speed pump installations for their energy-saving benefits․

Common Pool Pump Problems & Solutions
Diagnosing pump issues often involves checking water levels, filter pressure, and impeller function․ Most problems—like priming issues or clogs—are fixable without a professional․
Pump Not Priming: Causes & Fixes
A pump failing to prime indicates it’s not moving water from the pool to the pump housing․ Several factors can contribute to this․ First, verify sufficient water levels in the pool; a low level prevents proper suction․ Next, inspect the skimmer and suction lines for blockages – leaves, debris, or closed valves can halt water flow․
Check for suction leaks in the plumbing between the pool and the pump; air entering the system disrupts priming․ Ensure the pump basket is clean, as a full basket restricts water intake․ If the weir in the skimmer is stuck closed, it will prevent water from reaching the pump․
To fix, add water to the pool, clear any obstructions, repair leaks, clean the pump basket, and adjust the skimmer weir․ After addressing these potential issues, manually prime the pump by opening the air relief valve and allowing air to escape until water flows steadily․
Low Flow Rate: Identifying & Resolving Issues
Reduced water flow suggests a restriction somewhere in the system․ Begin by checking the filter pressure; a high reading indicates a clogged filter needing backwashing․ Inspect the pump basket for debris accumulation, as even partial blockage significantly reduces flow․ Verify all valves (suction, return) are fully open, ensuring unrestricted water passage․
A partially clogged impeller is a common culprit․ If the pump churns but delivers minimal water, the impeller may be obstructed․ Examine the suction lines for kinks or collapses, hindering water intake․ Inspect the return jets to confirm they aren’t partially closed or blocked․
To resolve, backwash the filter, clean the pump basket, fully open all valves, clean or replace the impeller, repair suction lines, and adjust return jets․ Addressing these points should restore optimal water circulation․
High Filter Pressure: What It Means & How to Address It
Elevated filter pressure signals a restriction in the filtration system, most commonly a dirty filter․ This forces the pump to work harder, potentially leading to damage․ A typical reading is 10-25 psi above the clean starting pressure; anything higher demands attention․ The primary solution is backwashing the filter – a process that reverses water flow to dislodge trapped debris․
If backwashing doesn’t resolve the issue, inspect the filter itself for tears or damage to the filter media․ Ensure all valves are fully open, as a partially closed valve creates resistance․ Check for obstructions in the suction lines, like leaves or debris․
Regular filter cleaning and backwashing are preventative measures․ Ignoring high pressure can strain the pump and reduce overall efficiency․ Monitor the pressure gauge regularly to proactively address potential issues․
Pump Churning But No Water Circulation
A churning pump with no water movement usually indicates a blockage or obstruction within the impeller housing․ This means the motor is running, but water isn’t being effectively drawn through and pushed out․ The most likely culprit is a clogged impeller – debris like leaves, hair, or small objects can become lodged, preventing it from spinning freely․
To address this, first, power off the pump! Access the impeller housing (consult your pump’s manual for specific instructions)․ Carefully remove any visible debris; Inspect the impeller for damage; cracks or broken blades necessitate replacement․
If the impeller is clear, investigate potential suction-side blockages – a closed valve or debris in the skimmer or main drain lines․ Ensure proper water levels are maintained, as low levels can cause airlocks․ A functioning impeller is crucial for efficient circulation․

Pump Maintenance & Preventative Measures
Proactive upkeep extends pump life and efficiency․ Regularly clean the basket, backwash the filter, and inspect seals to prevent costly repairs and ensure optimal performance․
Regularly Cleaning the Pump Basket
The pump basket is your first line of defense against debris entering and potentially damaging the pump impeller․ Leaves, twigs, hair, and other contaminants accumulate here, restricting water flow and causing the pump to work harder․ Regular cleaning – ideally weekly, or even more frequently during peak seasons – is crucial for maintaining optimal pump performance․
To clean the basket, always turn off the pump power at the breaker before opening the pump housing․ Remove the basket lid, carefully lift out the basket, and discard any collected debris․ Inspect the basket for cracks or damage and replace it if necessary․ Before reassembling, check the pump housing for any lodged debris․ Ensure the basket is properly seated in its housing before replacing the lid and restoring power․ A clean basket promotes efficient water circulation and prevents unnecessary strain on the pump motor, ultimately extending its lifespan and reducing energy consumption․
Backwashing Your Filter: A Step-by-Step Guide
Backwashing reverses the water flow through your filter, flushing out trapped dirt and debris that accumulate during normal operation․ High filter pressure is the primary indicator that backwashing is needed – typically when it’s 8-10 PSI above the clean starting pressure․
Here’s a step-by-step guide: First, turn off the pump․ Set the multiport valve to the “Backwash” position․ Ensure all drain lines are properly connected and directed away from electrical components․ Turn the pump back on and allow it to run for 2-3 minutes, or until the water in the sight glass runs clear․ Then, turn off the pump again․ Set the valve to “Rinse” and run for 30-60 seconds․ Finally, return the valve to the “Filter” position and resume normal operation․ Regularly backwashing maintains optimal filtration and prevents damage to your pump and filter system․
Inspecting & Maintaining Pump Seals & O-Rings
Pump seals and O-rings are crucial for preventing water leaks around the pump housing and motor․ Regular inspection is key; look for cracks, wear, or deformation․ A failing seal can lead to significant water loss and potential motor damage․ To inspect, turn off the pump power and carefully disassemble the pump housing, following the manufacturer’s instructions․
Lubricate new O-rings with a silicone-based lubricant before installation – never petroleum-based products! Ensure the seal surface is clean and free of debris․ Replace any damaged or worn seals and O-rings immediately․ Proper seal maintenance minimizes leaks, extends pump life, and ensures efficient operation․ Ignoring these components can result in costly repairs and downtime, so proactive care is essential for a trouble-free pool season․

Advanced Troubleshooting
Mechanical, plumbing, and electrical issues can plague your pump․ Knowing what to look for is vital; diagnosing problems requires a systematic approach and careful observation․
Diagnosing Electrical Issues (Safety First!)
Electrical problems demand extreme caution! Always disconnect power to the pump at the breaker before any inspection․ Verify the breaker hasn’t tripped – a simple reset might resolve the issue․ Check the pump’s wiring connections for corrosion or looseness, ensuring they are tight and secure․ Inspect the motor housing for any signs of burning or damage, which indicates a potential winding failure․
Use a multimeter to test for voltage at the pump’s terminals (with the power OFF, of course!)․ A lack of voltage points to a breaker, wiring, or switch problem․ If voltage is present but the pump doesn’t run, the motor capacitor might be faulty – these often bulge or leak․ Replacing a capacitor requires knowledge of electrical safety; if unsure, consult a qualified electrician․ Never attempt repairs while the power is on, and always adhere to local electrical codes․
Impeller Inspection & Cleaning/Replacement
A clogged impeller is a frequent cause of low flow or churning․ To inspect, disconnect power and remove the pump lid․ The impeller is typically held in place by a screw or clip․ Carefully remove it and check for debris like leaves, hair, or small objects obstructing the blades․ Clean the impeller thoroughly, ensuring all passages are clear;
If the impeller is damaged – cracked, broken blades, or severely worn – replacement is necessary․ When installing a new impeller, ensure it’s the correct type for your pump model․ Lubricate the impeller shaft with a silicone-based lubricant before installation․ Securely tighten the retaining screw or clip․ A worn or damaged impeller significantly reduces pump efficiency and can lead to motor strain․ Regular inspection can prevent more serious issues and maintain optimal performance․
Identifying & Repairing Suction Leaks
Suction leaks manifest as difficulty priming the pump or a consistent loss of prime․ Inspect all suction-side plumbing – skimmer lines, main drain lines, and pump connections – for cracks, loose fittings, or damaged seals․ A common culprit is a cracked skimmer weir door, preventing a proper water seal․
To test for leaks, run the pump and visually inspect connections while applying slight pressure․ Tighten loose fittings or replace damaged sections of pipe․ For skimmer leaks, replace the weir door․ O-rings and seals are prone to drying and cracking, so inspect and replace them as needed; Addressing suction leaks is crucial for maintaining proper water flow and preventing air from entering the system, which can damage the pump․

Pump Upgrades & Efficiency
Consider variable speed pumps for significant energy savings and quieter operation․ Explore energy-efficient options to reduce costs and enhance your pool’s overall performance․
Variable Speed Pumps: Benefits & Installation
Variable speed pumps represent a significant advancement in pool technology, offering substantial benefits over traditional single-speed models․ The primary advantage lies in energy efficiency; by running at lower speeds for extended periods, they dramatically reduce electricity consumption – often saving pool owners hundreds of dollars annually․ Quieter operation is another key benefit, eliminating the loud hum associated with conventional pumps․
Installation typically requires a qualified electrician and plumber, as it involves electrical wiring and plumbing connections․ While the initial cost is higher, the long-term savings and improved performance often justify the investment․ Many utility companies also offer rebates for installing energy-efficient pumps․ Programming these pumps involves setting different speeds for various functions – filtration, heating, and cleaning – optimizing performance and minimizing energy use․ Proper setup is crucial to realizing the full potential of a variable speed pump․
Energy-Efficient Pump Options
Beyond variable speed pumps, several other options contribute to a more energy-conscious pool system․ Two-speed pumps offer a simpler, more affordable alternative, allowing you to switch between high and low speeds for different tasks․ While not as customizable as variable speed models, they still provide noticeable energy savings․ Consider pump size carefully; an oversized pump wastes energy by circulating water faster than necessary․
Look for pumps with Energy Star certification, indicating they meet strict energy efficiency guidelines․ Regularly inspecting and maintaining your pump – cleaning the basket, checking seals – also improves efficiency․ Optimizing your filtration schedule, running the pump only when needed, further reduces energy consumption․ Combining energy-efficient pump technology with smart pool controllers allows for automated scheduling and remote monitoring, maximizing savings and convenience․ Prioritizing efficiency benefits both your wallet and the environment․